Quantcast
Channel: Think for yourself!
Viewing all 65 articles
Browse latest View live

Humble Bundle for Android 5 on Debian 64Bit

$
0
0
There is currently a new "Humble Bundle for Android 5" at https://www.humblebundle.com/

You can get:
  • Beat Hazard Ultra
  • Dynamite Jack
  • Solar 2
  • NightSky HD
  • Super Hexagon
  • Dungeon Defenders

Dynamite Jack:
It started fine. But no sound was there. Reading the output from starting the game on the terminal I saw a line about a missing:
/usr/lib32/alsa-lib/libasound_module_pcm_pulse.so
There is a "LINUX.txt" coming with Dynamite Jack telling something about Alsa. It wasn't exactly what I was looking for but it made me thinking.
The missing file is normally there:
apt-file search libasound_module_pcm_pulse.so
libasound2-plugins: /usr/lib/x86_64-linux-gnu/alsa-lib/libasound_module_pcm_pulse.so
Multiarch. As you see. So the corresponding bit for 32Bit is
libasound2-plugins:i386: /usr/lib/i386-linux-gnu/alsa-lib/libasound_module_pcm_pulse.so
Making a link to it like this:
  sudo ln -s /usr/lib/i386-linux-gnu/alsa-lib/ /usr/lib32/
should do the trick. (Be sure to have libasound2-plugins:i386 installed. If you don't know then just do a: sudo aptitude install libasound2-plugins:i386 )
It worked for me. And with that I had sound.


Solar 2:
Worked. No problems.
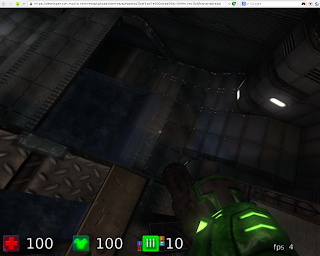


Beat Hazard Ultra:
Hello libc ...
./BeatHazard
./all/BeatHazard_Linux2: /lib/i386-linux-gnu/i686/cmov/libc.so.6: version `GLIBC_2.15' not found (required by ./all/hge_lib/liballegro.so.5.0)
On Debian  you currently just have 2.11 and 2.13 if you walk on the save side:
http://packages.debian.org/search?keywords=libc6&searchon=names&suite=all&section=all

On the experimental path there actually is a 2.17 available. I haven't tried that yet.
So you have some options now:
  1. Install from experimental. But don't blame people if your system doesn't work right after that move. It's not called experimental just for fun ;-)
  2. Get working libc6 from somewhere and do the LD_LIBRARY_PATH dance.
I took the second step because I already had that setup. Steam got the same libc6 problem but luckily someone made a little script :
http://steamcommunity.com/app/221410/discussions/0/882965118613928324/

After that somewhere around:
~/.local/share/Steam/ubuntu12_32/
the file should be.
You can also download the libc6 e.g. from here:
http://packages.debian.org/experimental/i386/libc6/download
and extract it.
Either way you should have a valid libc6 with you.
Then you can start telling the game where that file should be:
LD_LIBRARY_PATH=~/.local/share/Steam/ubuntu12_32/ ./BeatHazard

Super Hexagon:
libc6 again.
./SuperHexagon
./x86_64/superhexagon.x86_64: /lib/x86_64-linux-gnu/libc.so.6: version `GLIBC_2.14' not found (required by ./x86_64/superhexagon.x86_64)
But this time there might be just one option. You need to upgrade your libc6. I tried using a newer libc6 with the LD_LIBRARY_PATH but it didn't work. It then just gives me different errors like this one:
./x86_64/superhexagon.x86_64: error while loading shared libraries: __vdso_time: invalid mode for dlopen(): Invalid argument
OK.
You have another option: Use the 32Bit version.
With that you can do the trick as with Beat Hazard. For me I start the game with this line:
LD_LIBRARY_PATH=~/.local/share/Steam/ubuntu12_32/:x86/ ./x86/superhexagon.x86

Nightsky HD:
Should it still be the same version as coming with Humble Indie Bundle 4 then it should be no problem.


Dungeon Defenders:
I just tried the version of Humble Indie Bundle 7 and that didn't work, giving me:
XIO:  fatal IO error 11 (Resource temporarily unavailable) on X server ":0"
      after 207 requests (207 known processed) with 0 events remaining.
XIO:  fatal IO error 11 (Resource temporarily unavailable) on X server ":0"
      after 18 requests (18 known processed) with 0 events remaining.
Google helped finding this:
The problem is because the launcher tries to find
/usr/bin/gnome-screensaver-command and fails after it.

So the actual fix for this problem if making the launcher doesn't find it or
continues if it was not found, as obviously a lot of us are not gnome users..

For a workaround, just use this command:
# ln -s /bin/true /usr/bin/gnome-screensaver-command

source: phoronix forun
http://forums.trendyent.com/showthread.php?88020-Linux-Version-XIO-Error&s=95cddeb9959b8a65de2ca62e06afb852&p=746999&viewfull=1#post746999

Really?
Seems to be a bad joke.
But it helps.

I could play a bit.

I guess the current version on HBfA5 is a bit better. And there is an update coming:
https://twitter.com/humblesupport/status/309017063173804033

Hopefully the Steam-version works soon too. I don't like to pull the 5GB for each nasty update...


So 2 out of 6 are working out of the box. Seeing those other being just minor fixable problems is good. Hopefully they patch those but I guess that they won't fix the libc6 issues. Just like "it works on Ubuntu LTS - have fun". At least we have some ways to still get the games working.


Have a nice time playing!

[BGE + GLSL] GLSL Shader Repository Addon

$
0
0
The Blender Game Engine can make use of shader written in GLSL. In the standard version you can easily use vertex and fragment shader for your objects and fragment shader for post-processing (also known as 2D Filter).

Simple way to add 2D Filter
Adding post-processing effects is very simple. In the logic brick section you'll find an Actuator called "Filter 2D" where you set up the filter you want to use. You can choose from pre-built filters or one of you own from a text file.

To just GLSL shader on your objects you need to do a bit more:
Use GLSL shader on object
To use a GLSL shader on your object you need to write a bit of python code.
My code does it in a very simple way. I assume that my object is just one mesh. Therefore I put the code only on the first mesh. A mesh can have different materials. Because I don't care I put my code on all attached materials. Currently I can only set the vertex and fragment shader code. That can come from a string defined somewhere or loaded into a string from some file. Because I like to keep code separate I have put the shader code into own files and load those into strings at the beginning of the function. You can also push some variables, also known as uniforms, to the shader. In my case the are a texture, some matrices and some floats. (Read more about those here: http://www.blender.org/documentation/blender_python_api_2_66a_release/bge.types.BL_Shader.html?highlight=shader#bge.types.BL_Shader)

Recent development in the harmony branch (https://svn.blender.org/svnroot/bf-blender/branches/ge_harmony/ ) is making using shader much easier, and also brings support for geometry shader.
Improvements inside the harmony branch
You don't need python code anymore. Just add a custom shader, choose its type, its source and you are ready to go.


A big problem remains:
Where do I get all those fancy shader from or do I have to code them all by myself?

Yes. And No.

For most things you don't need a custom shader. There are built-in post-processing shader and for materials and objects you can use the material nodes most of the time.
But there are cases where you need custom code. If you are lucky someone already posted the answer to your question on some forum, probably on http://blenderartists.org/ . Have fun searching…

There was a discussion about integrating more shader into Blender:
http://blenderartists.org/forum/showthread.php?283250-Shader-Trunk-Integration

And because I had time and an idea I made a little addon:
GLSL Shader Repository

Basically there is a repository at https://bitbucket.org/Urfoex/bge-shader/
It has some shader sorted in folders.
The addon "GLSLShaderRepository.py" can be downloaded from the top directory. (Click on the file in the source view: https://bitbucket.org/Urfoex/bge-shader/src and select RAW from top right. Then save it e.g. via File → "Save page as …" or by pushing Ctrl + S ) Inside Blender go to
File → User Preferences… → Addons → Install from File…
and select the fresh downloaded file GLSLShaderRepository.py
You should get something that looks like this:
Addon loaded and activated
 You don't need to change a thing. If you disable "Use ZIPped Version" the addon will try to download the files using mercurial. Now you'll find a new option under File → Import:

Import shader from repository
That will download all shader from the repository and modify some files. Because of the modification you need to restart Blender now. Just then the new options will appear. They will be in the editor under Templates:
Vertex shader
Fragment shader
Post Processing shader

Click on one of the shader and it gets loaded as an internal file.
So currently the post-processing shader are easiest to use with the Filter 2D Actuator. 

Most of those shader I found on http://blenderartists.org/
I haven't tried them so they might not work. Please post issues (best on the repository site) so they can be fixed.

It would be very nice if you could also give me more shader to put in the repository. There is also a reference folder in the repository containing lots of shader code that would need some revision to make it compatible with BGE.


Now have fun with shader!

[BGE, Qt5] Coding Blender Game Engine

$
0
0
The Blender Game Engine lacks features. But as it's Open Source you can improve it as you like.

I thought so myself and tried to do it. Here is a short log on what I did.

While working with BGE I found some points that could need improvement or would be nice to have implemented. Here is a little list I came up with:
- irgendwie müsste man auch Qt GUI Elemente in die GameEngine rendern und nutzen können.
- dyn. add&rem. lights

- custom glsl material node ?

Just some improvements that are floating through my mind:
→ multithreading
→ easy (especially on the documentation part) usage of dynamic libraries and low-level engine improvements written in other languages (particularly C++)
→ easy usage of non-python scripts/modules, like C++, Java, C#, ... (e.g. create a dyn. lib. and use it via C++-Script-/Module-Controller)
→ OpenGL 3+4 support
→ integration of a high-level shading language like surface-shaders from Unity3D or OpenShadingLanguage
→ code-completion in editor (e.g. bge python and shader stuff)
→ independent game window so you can tweak stuff in Blender
→ ability to tweak variables while game is running
→ shop integration for plugins and assets
→ integration of a version control system, version controlable blend-files
→ more detailed profiling
→ better lighting (I know it's being worked on in candy/harmony)
→ ability to export/deploy to different platforms and not just to yourself
→ better/easier system it insert and keep track of project-assets and prefabs/linked objects (also those that are not in the blend file but in project path)
→ hardware particle system (I heard that someone is also working on that)
→ special game screen layouts
→ game logic sets ( putting different SCAs in a set/group, loading and saving those, adding sets on different objects, having different sets on an object,,, e.g. loading a first person set on your main-char-object)
→ same 3D-view when I switch screen layouts
→ easy system to do shadow- and lightmapping for e.g. all statics objects in scene
→ easy/simple GUI system [seen that around here]
→ easy/simple multiplayer system (if not integrated then e.g. a simple system to talk to e.g. RakNet) [yeah, here is already flying something around]
→ (deployment of an HTML5 version)
...


Additions to the wish-list:
→ Controller to call binary modules written in C++/Java/C#/…
→ flag to module-controller to start module asynchronous/threaded
→ adding a module-controller that doesn't already exist will create that including code for bound in- and outlets
→ "Next" / "Follow-Up" Actuator & Sensor - combination
e.g. || S: OnCollision → C: CheckConditions → A: Next & S: Next + S: OnKey[W] → C: AND → A: Motion ||
the Actuator should have a flag to say if the follow-up should be evaluated in the same or the next round
→ "State"-Sensor: reacting on entity:: creation, initialization, awake, update, sleep, deinitialization, destruction(, …?)
→ Option for S,C,A to select on which object/objects to act on (like having a control-object to control many equal object, you don't wanna put bricks on all of them, you could put logic on the controller and then on options tell on which objects/groups to act/react on,
e.g. a group of fireflies, S:OnHit(any of group FireFlies) → C: And → A: Glow(the one) | or A: Glow(all) | or A: Death(pony) )

[I know that most of those stuff is already doable via SCAs and Python. But having it a bit cleaner and packed together seems nice.
Also I don't mind having different Sensors being able to do the same stuff. As long as it's easier to use/understand or more consistent.]

→ grouping of SCAs
→ selection of SCAs → drag & drop to other object → option to move or copy over
→ saving of SCAs into & creation of SCAs from code-files


→ ability to pause game → continue normally or do just one step
→ ability to change properties (especially when paused)
→ visualize "flow" of commands through SCAs ("which why what when")
→ profiling of SCAs
→ profiling of modules

- UV scrolling
- Texture nodes
- OSL (Open Shading Language)
- timer in shader nodes
- Particle system (mokazon)
- Hive node GUI
- change vars while running
- OpenGL 3/4
- Prefabs
- VCS support for blend
- PureData for sound effects?
- C++ modules to call from nodes
- dynamic/procedural textures
- Threading
- group logic-bricks (hive)
- profiling
- VBOs
- HW Skinning
- Team-Development - Connected via network, working on one file(?)


glGetUniformLocation
glUseProgram
http://www.opengl.org/sdk/docs/man3/xhtml/glUseProgram.xml
Currently the shader program is part of BL_Shader. And it is capsuled pretty good. So BL_Shader should be exchangeable. So some "setShader" would be nice inside KX_BlenderMaterial.

2) RAS_IPolyMaterial just has one texture. BL_Material has access to more. Same goes for KX_BlenderMaterial. As KX_BM is a RAS_IPM there might be a way to query the the texturename with a virtual method.

 3) Create a state that disables the output of those messages.


My last works with BGE mostly had something to do with shader:
[BGE+GLSL] Finding interest points
[BGE + GLSL] Py GL Rant
[BGE + GLSL] GLSL Shader Repository Addon

That's why I started digging around in the C++ BGE shader code.
To get into the code, and because I like to work with the new features of C++11, I refactored the code in BL_Shader.
Nothing special.
Replacing plain pointers with shared pointer.
Using constant variables and expressions instead of defines.
Strings and not char pointer.
Arrays, templates and 'move'ment against void pointer.

I like it much better in this way.
You can find the code here in the cpp11 branch:
https://bitbucket.org/Urfoex/blender/


The first real coding was the integration of a shader manager.
Having just some objects around it might not matter so much. But using lots of objects with a custom shader on each this might be helpful.
Currently a shader is placed on a material. Many objects with all having the same material will also have the same shader on it. But if you have many objects with unique materials but each using the same shader, each material will have its own shader.
10k objects with the same material → one shader
10k objects with different materials and same shader → 10k shader

Additional nice little feature: Every shader needs to be compiled and linked. And every time you do that you'll get some nice message lines saying that it worked, or not.  Getting 10k messages isn't nice.

That's why I made a little shader manager.
It is rather simple:
Each shader-program gets a unique name and is stored in a map. When you create a shader-program you can give it a name. If it is already taken then that one is returned, else it will give you a new shader-program. (A shader-program is a combination of vertex and fragment shader.)
The map contains a shared pointer to the shader-program. When you remove a shader from the material the shared pointer will be decreased automatically.
Normally closing the game engine would also remove all shader. But using the in Blender embedded game engine the shader manager will stay and the shader in it too. So I included a check if the reference counter got to a minimum, meaning no object is using the shader anymore, then the shader would be removed.
Still one little thing bothers me a bit:
if one object has a shader and is the only object having this shader and I remove it, the shader gets removed. When I want to used the shader on an object again, it needs to be recreated. A possible way around could be to "store" the shader in another material.
With the shader manager I also put methods to python to query e.g. 'useShader', 'hasSource' and 'hasUniform'.


From OpenGL 3.2 geometry shader are a core part. I have a graphics card that can use those. So my next move was to make geometry shader available in BGE. That in itself isn't that hard. Just like with vertex and fragment shader you create the shader object, load the code into it and link it to the shader program. Because I dislike duplicated code I made a little refactoring first. But as I tested my changes it didn't seem to work. Up to this point I still don't know why. I guess it's BGE and its buggy OpenGL code.
Just to check if my drivers and my code are OK I created a little OpenGL sample with Qt5:
Qt5 OpenGL GLSL Source Code


Vertex shader:
attribute vec4 qt_Vertex;
attribute vec4 qt_Color;

uniform mat4 qt_ModelViewProjectionMatrix;

void main(void)
{
    gl_Position = qt_ModelViewProjectionMatrix * qt_Vertex;
}
Geometry shader:
 #version 330

layout(triangles) in;
layout(triangle_strip, max_vertices = 6) out;

uniform float time;

void main(void)
{

    gl_Position = vec4(abs(time),0,0,1);
    EmitVertex();
    gl_Position = vec4(0,time,0,1);
    EmitVertex();
    gl_Position = vec4(0,0,time,1);
    EmitVertex();
    EndPrimitive();

    gl_Position = vec4(-abs(time),0,0,1);
    EmitVertex();
    gl_Position = vec4(0,-time,0,1);
    EmitVertex();
    gl_Position = vec4(0,0,time,1);
    EmitVertex();

    EndPrimitive();
}
Fragment shader:
void main(void)
{
    gl_FragColor = vec4(1,0,0,1);
}
Simple as that.
And as you can see, it works.
(Coding Qt5 is a nice thing. But you currently are mostly on your own. Tutorials aren't yet ported over (it seems). And to make geometry shader work I needed to use the older QGLShader classes instead of the new QOpenGLShader classes. The extra bits and pieces should arrive with Qt5.1 and 5.2. At least that is what the man sad:
QtDD12 - OpenGL with Qt 5 - Dr. Sean Harmer
QtDD12 - Modern Shader-based OpenGL Techniques - Dr. Sean Harmer
)

But in Blender I get this:
You see the missing cube?
That one has an active geometry shader.
The console output says: All is fine:
source/gameengine/Ketsji/BL_Shader.cpp:295:---- Vertex Shader Error ----
source/gameengine/Ketsji/BL_Shader.cpp:296:Vertex shader was successfully compiled to run on hardware.

source/gameengine/Ketsji/BL_Shader.cpp:295:---- Geometry Shader Error ----
source/gameengine/Ketsji/BL_Shader.cpp:296:Geometry shader was successfully compiled to run on hardware.

source/gameengine/Ketsji/BL_Shader.cpp:295:---- Fragment Shader Error ----
source/gameengine/Ketsji/BL_Shader.cpp:296:Fragment shader was successfully compiled to run on hardware.

source/gameengine/Ketsji/BL_Shader.cpp:363:---- GLSL Program ----
source/gameengine/Ketsji/BL_Shader.cpp:364:Vertex shader(s) linked, fragment shader(s) linked, geometry shader(s) linked.
Btw.:
First time I tried the geometry shader in BGE it just crashed.
http://blenderartists.org/forum/showthread.php?286152-FGLRX-vs-BGE-Geometry-Shader-on-Linux-on-ATI-SIGSEGV

Digging through code I saw a place saying: "Don't use displaylist with VBO"
As I thought BGE would use VBOs I looked in the property panel and found displaylists enabled. So with that on it wouldn't use VBOs.
(As far as I know VBOs should be currently the best way to get your vertex data to your graphics card: http://www.opengl.org/wiki/Vertex_Specification#Vertex_Buffer_Object)
But in the storage-section of the property-panel there is no VBO to choose from.
Just because someone disabled them –.–

Oh men!

OK. Uncommenting was easy. I re-enabled VBOs. But that didn't help. The object still didn't show up.
Why?
I don't know. Without any error messages it is really hard to figure out.
Because it is working with VBOs and Qt5 I would say that there is an implementation problem inside BGE.


If OpenGL is working better within Qt5 I thought about moving the BGE somehow in to Qt5. The first thing I wanted to try was to show a Qt window when pressing play and having both windows, the Blender one and the Qt one, show the game. "No problem" I thought. BGE uses GLEW for OpenGL access currently. To render to different windows I would need to switch the context. There is a special GLEW_MX version for that (http://glew.sourceforge.net/advanced.html).
So the first step was to replace GLEW with GLEW_MX.
Next step: integrate Qt5.
I found a spot where I thought it would be a good place to start the Qt window. I got it open. And closed. And closing Blender gave me a crash somewhere in the window handling. Even with that error I've put in the Qt window a simple OpenGL context and tried to show that.
Didn't work.
Qt tells you that you can't mix GLEW and Qt-OpengGL functions.
And my system hang up sometimes when trying to start the game.

So I stopped.


One way to make this work could be to put the blenderplayer in Qt.
But the code isn't nice.
I mean the code of BGE, Blender and the glue between.
I have nothing against C and C++. But please don't mix…
Finding the code entry where BGE starts was a heck of a search. You know that starting a C or C++ program has always something to do with a  main function. You'll find some. And one is the one for Blender and BGE. And it calls sweet C functions. I didn't find the right entry into BGE here.
There is the game start button in the properties panel. And you'll find some lines of code for that in a python file. But as it looks like it doesn't start the BGE. A suspicious looking string will get you to a C function. Still not starting anything.
Per luck I used a debugger, started the game and did a break in the debugger. There I saw a function history that lead me to the start of the BGE.

I'm not someone that wants classes and object orientation anywhere. But having easy traceable and capsuled code is nicer then this extern C mess.
The game engine itself is written in C++. It's easier to jump around and find what you are looking for. But the code is also a mix of C and C++. That makes it smell not so good. Having clean C++, especially with C++11, would be very nice.
And a documentation. Please document your code :-(
Walking around the code it wasn't that hard to follow the concepts. But all in all documented code looks much nicer.

As I said above the glue code is also mind bowing. For Qt and GLEW_MX I needed to change some CMake files. But what the heck is that?
They made macros for like everything. Changing GLEW to GLEW_MX was the easy part here. Just search for the string in all cmake files and replace it. But for Qt I needed to put in the finding and includes and linking and such. As I couldn't figure out where to really put it I just placed it where the corresponding executable would be build.


A Qt-OpenGL powered BGE would be really nice. I'd like to do things like this:

With a package like Qt it should be much easier to develop and extend a big application like Blender and BGE.
Not just easier access to OpenGL and shader. Also a very nice way to put GUI into your game. And probably instant portability to the major systems: Mac, Windows, Linux, Android and iOS (last two should arrive in Qt in the near future).


The funny thing about all this is:
You can still create great stuff with BGE.
Just look through some projects here:
http://blenderartists.org/forum/forumdisplay.php?34-Game-Engine

or search on http://www.google.com/videohp for Blender GE or BGE or game.

But also the engine needs an upgrade to 2013.
Really.
Look at http://devmaster.net/devdb/engines and you will see lots of open source game engines that perform much better then BGE.

Here are some:
http://www.garagegames.com/products/torque-3d
http://irrlicht.sourceforge.net/
http://www.crystalspace3d.org/main/Main_Page
http://sauerbraten.org/
http://softpixelengine.sourceforge.net/screenshots.html
http://www.cafu.de/
https://bitbucket.org/gongminmin/klayge
http://code.google.com/p/urho3d/
http://www.iddevnet.com/doom3/
https://github.com/id-Software/DOOM-3-BFG/
http://www.maratis3d.org/
http://gameplay3d.org/

The big winning points BGE currently have are:
→ very easy to use
→ nice integration with Blender (even when you can't take all things over 1 to 1)


I'd really like to see and help BGE grow…

Why I prefer "native" games

$
0
0
I like the movement of HTML5 and WebGL.
But I still prefer native gaming.
A simple argument: performance.
Just compare those two implementations.

BananaBread.
HTML5, JS, WebGL
 

Sauerbraten.
C++, OpenGL
http://sauerbraten.org/


I know that the comparison has some flaws. It's not the same map and not the same graphic settings. In BananaBread I choose "Low" settings and in Sauerbraten I have moderate settings.
So I have better quality and better FPS inside the "native" game.

Zusammenfassung meiner Arbeit mit und an der Blender Game Engine

$
0
0
Im Verlauf des letzten Semester durfte ich mit und an der Blender Game Engine austoben. Dies konnte man schon in meinen letzten Blogeinträgen lesen. Für das Fach Independent Coursework 2 habe ich nun mein Arbeit zusammengefasst. Hier ist die Dokumentation in PDF Form:
https://docs.google.com/file/d/0B-DgjzoFZxxwQmxyTGk2cTd0ZU0/edit?usp=sharing

Warum solltest ausgerechnet du dir dieses PDF angucken?
Wahrscheinlich eher weniger um zu sehen, was ich gemacht habe. Ein Großteil davon steht ja schon hier ausführlicher im Blog.

Falls du allerdings an der Blender Game Engine interessiert bist und einen kleinen Überblick erhaschen willst, dann könnte ein Blick in diese PDF dir vielleicht weiterhelfen. Nicht zuletzt wegen der Auswahl an Bildmaterial, die dich eventuell beeindrucken könnten ;-)


Viel Spaß beim Stöbern!

Qt 5 on Android - getting started

$
0
0
For our master thesis we need a quite easy way to create applications for different platforms and systems. For now the main targets are Windows, Linux and Android. The simplest way would be HTML5. It should run here, there and probably everywhere. But the performance isn't that great for what we want to achieve. Java could be an option as long as we won't go in the direction of Apple. Another option is the use of something like Unity3D. But it is big, clunky and I won't be able to develop with it from my Linux machine.

A much better approach is the use of Qt. With Qt 5 Android and iOS will be supported directly from the Qt SDK. Before you had to use an external extension to make it work.
Just write your blazing fast C++ code for the back-end and use QML and JavaScript code for the front-end and scripting. Write it once and export and use it on all supported platforms.


For now Qt says that Android support is more of a "technology preview" and the current Qt version to use for it is still beta. But it works!

So how to get started?

You need some things to install. ADT, NDK, Qt, Ant, JDK, (Creator, Compiler, ...). Some setup. It's easier then you might think.

The newest version of Qt is 5.1 which is currently in RC1 stage. Here is a list of new features:

You might also wanna look at possible problems that might be still in there:

Announcement of Qt 5.1 RC1:

I took the online installer for Linux 64Bit:

Those are the things I installed:
If you don't have an Android device around you should prefer the Android x86 version because with some tricks you can make your emulator hardware accelerated and therefore it works much better then the armv7 version. You'll find more information and how to setup your tools right here:

You also need the Android Developer Tools - ADT from:

And the Native-Code Development Kit - NDK from:

The Qt 5 for Android page (http://qt-project.org/wiki/Qt5ForAndroidBuilding) says that you should use a custom NDK version from http://code.google.com/p/mingw-and-ndk/downloads/list . For now I used the official NDK and haven't had a problem. But who knows…

For Linux the ADT and the NDK are just archives that want to be extracted. On my installation it looks like this:

Also you should have a working installation of ant and the Java JDK. You could install those via:
aptitude install ant openjdk-7-jdk
That should be all you need.
To build and test your application on you desktop you should have clang and gcc installed. So you might want to do something like:
aptitude install clang-3.3 llvm-3.3-dev g++-4.8 

The Qt Creator that comes with Qt 5.1 should be OK. But there is also a newer beta version out there:
http://blog.qt.digia.com/blog/2013/05/30/qt-creator-2-8-0-beta-released/


Let's start building!

There are just some configurations left. Do make those we need the Qt Creator running.
Go to
Tools → Options → Android
The Ant and JDK locations should be set automatically. If not, check if you have them installed correctly.
The Android SDK and NDK locations you need to set yourself. For me those two locations are
~/projects/Qt/adt-bundle-linux-x86_64-20130219/sdk
~/projects/Qt/android-ndk-r8e 

The following changes are needed in the "Build & Run" section.
Specify where the Qt version are,

compilers should be found automatically,

most kits should also be ready automatically. I just needed to add kits for my desktop environment.


The first Android app

Now you are ready to create your first Android app. Create a new project under
File → New File or Project → Applications → Qt Quick 2 Application (Build-in Types)

Plug you Android device to you computer. Be sure to also have set up your device correctly so that it allows the connection.
Check your settings so it will build for arm.
And then: Push the big "Run" button.

The project will be build, deployed to your device and there executed.
You device should look like this now:

If you get some build errors then check out this site: http://qt-project.org/wiki/Building_Qt_5_from_Git
I needed e.g. libglu1-mesa-dev and some of the libxcb ones.

The first test project I did I named "1". Somehow I couldn't get it on the device. I don't know why. Maybe the name was not allowed. The second test I named "Simple_test" and that made it working.

Another "thing" I encountered is the way the Qt packages get on the device. In the
Project → Run → Deploy configuration
you can choose which Qt libraries to use and where they should come from.

The standard is "Use Qt libraries from device" and "Use local Qt libraries". For a simple TicTacToe game I made it worked without problems. 
Without the check on "Use local Qt libraries" when starting you app it will ask you to install Ministro:
https://play.google.com/store/apps/details?id=org.kde.necessitas.ministro&hl=de

Those are the standard libraries for your android device and should work best. Also they just need to be installed once and every other Qt based app will just use them.


In short

  1. Get 
    1. Qt 5.1 (http://download.qt-project.org/online/qt5/online_installers/), 
    2. ADT (http://developer.android.com/sdk/index.html), 
    3. NDK (http://developer.android.com/tools/sdk/ndk/index.html), 
    4. Ant, JDK, GCC/Clang, (other development files …)
  2. Install Qt, extract ADT & NDK
  3. Setup Qt Creator to use ADT & NDK, Qt versions, compiler, kits
  4. Build and deploy your Qt app for Android
  5. Have fun!

[C++11] Performance of casting and pointer

$
0
0
I played around with C++ trying to decrease build time by using pimpl and a base class.
Having some arbitrary base class in the pointer I need to cast it to the real data type when I wanna use it.
For the pointer I tried *, shared_ptr and unique_ptr and took times with and without casting.
The code is very basic:

For my test I compiled it without optimization and with debugging enabled.
Optimization is awesome. Still when I work on  a project most times I make debug builds because they are easier to debug. And when I can save time when debugging - then why not ;-)

Now the results (average of 8 tests):

Sample_Data*                                   ~5.8s
BaseClass* static_cast<>                       ~5.6s
BaseClass* dynamic_cast<>                      ~6.3s
shared_ptr<Sample_Data*>                       ~6.0s
unique_ptr<Sample_Data*>                       ~6.4s
shared_ptr<BaseClass> static_pointer_cast<>    ~9.0s
shared_ptr<BaseClass> dynamic_pointer_cast<>   ~9.5s
shared_ptr<BaseClass> static_cast<ptr.get()>   ~5.8s
shared_ptr<BaseClass> dynamic_cast<ptr.get()>  ~6.5s

This values look a bit strange to me.
Using normal pointers is faster then smart pointers is kind of understandable because there is less to do and manage. Same goes for static versus dynamic cast. 
But how can a static_cast from a normal pointer from a base class be faster then accessing the right class with a normal pointer directly?

What "normal" things can be seen?
→ A shared_ptr behaves as nearly as fast as a normal pointer.
→ A unique_ptr is slower then a shared_ptr.
→ A dynamic_(pointer_)cast is slower then a static_(pointer_)cast.
→ Casting shared_ptr is much slower then casting normal pointer.

So if you need to cast a lot - try to avoid smart pointers. Or cast the pointer that is inside the shared_ptr ( like this: static_cast<Derived_Class*>(baseClassSharedPointer.get()) ); But don't give that "free" pointer away!

When you know that the cast will work 100% of the time - prefer static cast.
If not 100% but most of the time then have a look at typeid.

Also: try to use smart pointers. Shared_ptr isn't that much slower then a normal pointer but you get some nice little extra: automatic destruction, and therefore maybe a bit less memory leaks ;-).


[Ludum Dare] 27 Jam entry


[How-To] Streaming audio and video on local network

$
0
0
I just wanted to stream some videos and music from one PC to another because that other has loudspeakers connected and a bigger screen. But how to do that?

The simplest thing: copy the files over.

Second thing: share the files via samba or NFS and play them.

You could also try VLC or IceCast or something like that.
I got the VLC one running. With RTP and RTSP. You can use the GUI - but then you can just play one file and then need to redo the setup the the next file ...
With RTP you also should convert to MPEG because else you might not see a thing. The pro side is: from the client you connect one time and then get new data. With RTSP you don't need to convert, the quality is better, but you need to reconnect after every file. Or set-up the server somehow to continuously play something. I didn't find the right things for that...
So the more you want the more you need to dive into config files.
IceCast is config files  from the ground up. So I didn't try at all.

I just wanted to stream some files the simplest way :-(

It should be something like this:
Server: wait for data, push incoming data to mplayer/vlc, they play
Client: connect to server, choose files, push to server

I thought I could do that quickly with QML but failed. It would take some time and C++ to do the task. So I searched for another way.

NetCat.
client: cat file | netcat ip port
server: netcat -l -p port |  mplayer

It works. Most times.
But after one file finished the server would also stop. I didn't find a way around.

But I found socat.
The improved netcat.
It works for now for me for most of the things.

The client:
#!/bin/sh
for FILE1 in "$@"
do
        echo "Here: $PWD/$FILE1"
        socat TCP4:${SERVERIP}:${SERVERPORT},nodelay,mss=8192 "$PWD/$FILE1"
done
Calling: ~/stream_this.sh ~/music/*
Plays some files.

The server:
#!/bin/sh
socat tcp-l:
${SERVERPORT},fork system:'vlc --quiet --play-and-exit --qt-start-minimized -',nofork
I use VLC to play the files. Socat will open a new VLC for each incoming file. That's why it will exit its VLC after each one and also will start minimized so it doesn't interrupt the normal work-flow. I tried allowing only one instance but somehow it didn't work.

*Works*
Not as nice and easy and GUI as it should but for now it's enough for me.

Have fun!

Linux Logitech Mouse Config

$
0
0
There is this nice config thing in KDE where you can tweak your mouse. You can find it in systemsettings or directly via "kcmshell4 mouse"
On my system it told me that I do not have permissions.
LogitechMouse::updateResolution: Error getting resolution from device :  error sending control message: Operation not permitted
Same problems with lomoco.
Writing to USB device: RES: Operation not permitted

You could do sudo. That works.
Or look in the systemsettings mouse help (and wonder where hotplug is...):
http://docs.kde.org/stable/en/kde-workspace/kcontrol/mouse/index.html#logitech-mouse

I didn't find a real solution on the net. But tinkering around I got to the udev.rules.
lomoco has some and installs them in /lib/udev/rules.d/ but they don't seem to set the group.
So I modified them to do so:
https://docs.google.com/file/d/0B-DgjzoFZxxweko5aWZCMm1nQTQ/edit?usp=sharing

Get that rules file and put it in /etc/udev/rules.d/ , restart udev via "service udev restart" and you should be good to go to modify the settings in the KDE settings and via lomoco without using sudo. If not, be sure that you are in that group too.

[Qt5, Android] Setting up Qt 5.2 for Android

$
0
0
I guess I won't need much words as most things can be seen in the pictures.
I hope it works for you as simple as for me.
Have fun!

I got the online installer from qt-project.org/downloads named: qt-linux-opensource-1.5.0-x64-online.run
Download and run it.


It can grab some older Qt versions. As we don't need those we don't check them.
If you have a ARMv5 device be sure to set the cross.
Most real devices won't be x86 so you normally don't need it. But it is good if you are testing on a virtual device. Because we will do that later it's checked here.


We need to setup the Android configuration.
(In case you already have a Qt and/or Android setup and have some configuration problems you might wanna check/remove/backup configurations and folders from Android, Qt and Trolltech from hidden places like ~/.config/… , ~/.local/share/… , ~/… )
You'll get to the next screen via menu: Tools → Options

They say they need the SDK and the NDK.
You'll get those here:
ADT-Bundle: http://developer.android.com/sdk/index.html
NDK: http://developer.android.com/tools/sdk/ndk/index.html
There is a SDK only version. I tried it but Qt Creator said that it would miss something. So you really should use the ADT-Bundle.

We will use a virtual device.
Currently there is non.
Start the Android AVD Manager.

Under Tools → Manage SDK you should check if all needed packages are installed.
For me I was not having the x86 image of Android. So I checked it.


After that I created a New virtual device.
Using the x86 ABI I will get hardware acceleration: http://developer.android.com/tools/devices/emulator.html#acceleration
That makes using the virtual device much more pleasant.

The new virtual device will also show up in the Qt Creator Options.

With those things set up we can check the Build & Run settings.
All needed configurations should be found automatically. Normally you should not need to manually add something yourself.


Now that is all set up we can create a little project to test if it will work.


Be sure that all of your desired targets are checked.
You can also add targets later.


In the Qt Creator, in the lower left, above the play button, there might be a computer icon or one of an Android dude, there you can select your current desired target platform. Android x86 it should be now.


Push the play button.
You will be greeted by a dialog to choose your device.
In this case we have just one that is shown in the compatible devices category.
That is what we want.

The Android virtual device will open.
In the background in Qt Creator you will see that the project is deploying.
Wait.
Wait.
Wait until it is done.
It might take a while.
After it finished your first Android app should open up looking like this:

If you had selected an ARMv7 target it would look like this:
In that case your virtual device is incompatible. Either change your target to Android x86 or create an Android ARMv7 virtual device.

Use the AVD manager for creating new virtual devices. It gives you more options and more control.


Have fun with your new set up!

[Blender] Verpixeln & Verwischen von Dingen in Videos

$
0
0
Ich habe eine Anfrage bekommen, wie man Gesichert wegen Datenschutz in Videos unkenntlich macht. Mit dem eingesetzte Editor "Movie Maker" ist dies nicht so schön zu erledigen. Mit Blender geht das jedoch deutlich besser.

Das Video hier zeigt es sehr schön:


(Etwas leichter ohne Tracking ist hier eine Anleitung zu finden: http://problemeblender.blogspot.de/2013/05/gesicht-verpixeln.html)

Nun ist Blender 2.70 draußen und es hat sich ein wenig getan.
In den beiden Tutorials wird zudem nur das Verwischen gezeigt. Bei heise, besser gesagt bei c't, habe ich eine Anleitung gefunden, die auch das Verpixel zeigt: http://www.heise.de/video/artikel/Kennzeichen-verpixeln-mit-Blender-1785398.html


Als Ausgangsmaterial nehme ich ein paar Frames aus "Sherlock Mini-Episode: Many Happy Returns", und zwar Frame 7922 bis 8229. Ein einfaches Ergebnis sieht wie folgt aus:


Beginnen wir also mit einem frischen Projekt.

Zuerst entfernen wir alle Objekte. Mit der Taste A wählen wir alles aus und mit X löschen wir die ausgewählten Objekte.

Als nächstes gehen wir in die Top-Ansicht. Und fügen eine Camera hinzu.

Die Camera wird auf der Z-Achse um 5 Einheiten verschoben. Danach wechseln wir die Ansicht auf die Camera.

Wir brauchen jetzt den Film. Besser gesagt: wir brauchen erst einmal einen Punkt, der einem Pfad folgt. Dieser Pfad wird durch ein Gesicht bestimmt. Dem Gesicht in dem Film.

Dazu wechseln wir die Ansicht zum "Motion Tracking". Und öffnen das gewünschte Video.

Im Menüpunkt Zoom findet man Einträge, mit denen man das Video im Festern auf eine passende Größe zoomen kann.

Als nächstes suchen wir uns die Stelle heraus, in der wir das Gesicht, oder auch andere Objekte, verwischt oder verpixelt darstellen wollen. Bei mir geht das bei Frame 7922 los und endet bei Frame 8229.
In der Zeitleiste lege ich als Start und Ende diese beide Zahlen fest, da ich nicht das gesamte Video rendern will. Mir reicht dieser kleine Ausschnitt.
Wer sein komplettes Video braucht, stellt die Zahlen auf Start 1 und Ende den letzten Frame des Videos. Diesen findet ihr im Movie Clip Editor (in der Mitte) rechts bei den Eigenschaften. Ganz unten ist das Feld "Footage Information". Dort steht Frame aktuell von insgesamt; bei mir in diesem Fall "Frame: 7922 / 10801"

In der Zeitleiste unten können wir alle aktuellen Frames, also von Start bis Ende, "View → View All" sehen.

Jetzt versuchen wir das Gesicht zu tracken.
Dazu setzten wir einen Marker. Mittig Links ist dazu der Knopf "Add", der sich in der Kategorie "Marker" befindet. Ein mal drauf klicken und danach etwa mittig dahin, wo das Gesicht ist. Es erscheint eine kleine weiße Box.

Über den Menüpunkt Track → Transform → Tanslate können wir diesen Marker verschieben und mit Resize dessen Größe verändern. Alternativ helfen die Tastendrücke S für Scale und G für Grab (Translate). Drückt man anschließend noch die X oder Y Taste, wird die Transformation auf eine Achse beschränkt.
(! Ist der Kopf oder das Objekt im Bild sehr groß, dann sollte der Marker möglichst nur einen markanten zentralen Punkt davon anvisieren. Und den Marker nicht unbedingt um das zweifache skalieren. Zu große Marker benötigen länger bei der Berechnung.)
Ich habe die Box in etwa auf Kopfgröße Scaliert und geschoben.

Rechts bei den Eigenschaften sieht man auch, was genau im Marker zu sehen ist.
Nun kann das Tracken des Markers beginnen. Dazu drücken wir links auf den Track Knopf.
Die Zeitleiste wird etwas vor laufen. Und dann passiert plötzlich nichts mehr. Im Eigenschaften-Bereich nimmt der Marker eine blass rote Farbe an.

Das heißt, dass der Marker sein Ziel verloren hat und wir ihn neu ausrichten müssen. Durch leichtes Verschieben dürfte der Marker ein neues Ziel bekommen, welches er weiter tracken kann.
Das muss jetzt bis zum Ende vollzogen werden. Versucht den Marker möglichst immer zentral im Gesicht zu halten. Dieser Punkt wird gleich als Zentrum der Verpixelung und Verwischung dienen.

In der Zeitleiste könnt ihr anschließend das Ergebnis überprüfen. Der Play-Knopf will bei mir nicht so ganz. Mit den Pfeiltasten funktioniert es jedoch ganz gut.

Aus dem bewegten Marker erstellen wir jetzt ein Empty. Ein Objekt, das genau diese Bewegung vollzieht. Dazu klicken wir auf den Knopf "Link Empty To Track", der sich im Tab Solve (links mittig) in der Kategorie Geometrie befindet.

Dieses Empty sollte sich nun in der 3D Ansicht befinden. Wir wechseln zur Ansicht "Default" und sehen dort das Empty als großes Kreuz.

Wir markieren das "Track" genannte Empty mit einem Rechtsklick und wählen "Object → Snap → Cursor To Selected".
Über "Add → Mesh → Plane" fügen wir eine neue Fläche ein, die an der Position des Cursors, und somit direkt am Empty, liegt.

Alternativ können wir auch einen "Add → Curve → Circle" oder "Nurbs Circle" nutzen, sollten aber dann rechts in den Properties bei "Object Data" das Shape von 3D auf 2D stellen.
Die Fläche kann jetzt zu groß oder zu klein sein. Um dies zu beheben, nutzen wir "Object → Transform → Scale" oder die Taste S. Wieder kann mit X und Y eine Achse fixiert werden. Eine Verschiebung (Translate, "Grab") wäre jetzt ungünstig und sollte vermieden werden. Auch eine Rotation ist nicht unbedingt angebracht.
Da wir wahrscheinlich aktuell nicht wissen, wie groß das Gesicht ist, sollten wir das Video als Hintergrundbild nutzen.
Dazu öffnen wir die Eigenschaften mittels "View → Properties" oder der N Taste.

Bei den Eigenschaften gehen wir unten auf "Background Images" und aktivieren dies. Ein Klick auf "Add Image" lässt mehr Eigenschaften erscheinen. Dort wählen wir "Movie Clip" und deaktivieren "Camera Clip". Mit dem Drücken auf Open suchen und öffnen wir unser Video. Danach sollte ein Bild im Cameraausschnitt zu sehen sein.
Damit lässt sich die Fläche deutlich einfacher auf die richtige Größe bringen.

Als nächstes heften wir die Ebene an das Empty.
Dazu wählen wir zuerst die Ebene aus. Diese wird orange. Danach drücken wir Shift und auf das Empty. Nun ist das Empty orange und die Ebene rot. Dann drücken wir auf "Object → Parent → Object" und bestätigen "Object".
Damit wird der Ebene gesagt, dass das Empty sein Parent ist und es ihm folgen soll. Bewegen wir jetzt die Zeitleiste, bewegt sich die Ebene mit dem Empty mit. Das Gesicht sollte dabei meist überdeckt sein.

Ob "Track" auch wirklich das Parent von "Plane" ist, können wir auch in den Properties von Plane anschauen. Dazu wählen wir wieder Plane aus und gehen bei Properties auf Object und finden in der Abteilung Relations die Parent-Einstellung.

Als nächstes folgen ein paar Farbeinstellungen.
Zunächst müssen die Farben für Horizon, Zenit und Ambient auf schwarz gesetzt werden. Die Felder dafür befinden sich im World-Bereich.

Unsere Plane bekommt ein weiß-leuchtendes Material.
Dazu legen wir ein neues Material an.
Die Diffuse-Farbe setzten wir auf weiß und dessen Intensität auf 1.
Die Intensität von Specular kommt auf 0.
Der Emit-Wert wird ebenfalls auf 1 gesetzt. Dadurch leuchtet die Plane von alleine und wir brauchen kein weiteres Licht.

Mit der Maus mittig auf dem Bild können wir den Test machen. Per Druck auf die Taste F12 wird die aktuelle Ansicht gerendert. Es sollte ein weißes Viereck auf schwarzem Grund sein. Diese Ansicht kann mittels Druck auf die ESC Taste wieder rückgängig gemacht werden.

Als nächstes folgt das Compositing.

Die Nodes werden gebraucht, also müssen diese aktiviert werden. "Auto Render" ist empfehlenswert, da wir so sofort Änderungen sehen. In den Performance Einstellungen können wir auch OpenCL aktivieren, was die Berechnung beschleunigen sollte. (Um ein erstes Bild unten links zu erhalten, kann es nötig sein F12 oder den Render-Knopf rechts zu drücken.)

Verpixeln oder Verwischen.
Das können wir jetzt machen, wie wir wollen.
Und sogar beides gleichzeitig nutzen.
Oder ganz andere Spielereien machen.
Hier die beiden Node-Setups für Verpixeln und Verwischen.

Die Nodes sind zu finden unter: Add →
→ Input → Movie Clip
→ Input → Value
→ Color → Mix
→ Converter → Math
→ Filter → Blur
→ Filter → Pixelate
→ Distort → Scale

Die Verfahren sind schnell erklärt. Zunächst Verwischen:
  • das Movie Clip Bild wird auf die Größe des zu rendernden Bildes skaliert
  • das skalierte Bild einmal in die Mix Node und einmal zum Bluren geschleust
  • das geblurte Bild kommt ebenfalls in die Mix Node
  • die Mix Node mischt die beiden einkommenden Bilder; dazu dient das schwarz-weiß Bild, das aus dem Render Layer kommt. Weiß bedeutet, dass der untere Eingang benutzt werden soll, also das verschwommene Bild, und bei schwarz wird der obere Eingang mit dem normalen Bild verwendet. Bei Grau-Tönen wird anteilig gemischt. Das wollen wir hier jedoch nicht. Das weiße Viereck ist genau da, wo das Gesicht ist. Somit wird anstelle des normalen Gesichts das verschwommene genommen. Bei den restlichen schwarzen Stellen kommt das normale Bild zur Anwendung.
Und Verpixeln:
  • hierfür skalieren wir zunächst das Eingangsbild herunter
  • verpixeln dies
  • und skalieren es wieder herauf
Dadurch entstehen die großen Pixel. Der Rest ist gleich zum Verwischen. Anstelle der Eingabe von Werten in den Scale-Nodes, habe ich eine Value-Node eingesetzt. Hier kann ich einmal die Skalierung einstellen. Diese überträgt den Wert an die Skalierungsboxen, einmal zum Vergrößern, und über die Berechnung 1/x zum Verkleinern.


Wenn wir jetzt in unserer Zeitleiste herum springen, merken wir, dass die Region der Unschärfe oder des verpixelt Sein nicht folgt. Dies scheint nur ein Problem in der Vorschau zu sein. Drückt den Render Knopf oder F12 und die Region ist wieder auf der richtigen Stelle.

Das heißt, wir können fast an die Ausgabe des Resultats gehen.
Zunächst aber noch das Einfügen der Audio-Daten.
Dazu wechseln wir in die "Video Editing" Ansicht.
Und fügen wieder unseren Film hinzu.

Achtet darauf, dass der Start-Frame auf 0 sitzt.
In meinem Fall wurde der Film auf Position 8000 eingefügt. Zuerst war das nicht sichtbar, weil die Zeitleiste nicht soweit ging.Mittels "View → View All Sequences" lassen sich alle Stücke anzeigen. Dann solltet ihr auch die finden, die ihr vermisst.
Der untere Strip ist bei mir der Film, der obere die Musik. Den unteren brauche ich nicht und kann ihn somit löschen.

Kommen wir zu guter Letzt noch zu den Render-Einstellungen.
Diese finden wir in den Properties. Ich habe mir hierfür die Default View geöffnet.

VLC hat mir über Tools → "Codec Information" ein paar Dinge verraten.

Die Frame Rate liegt bei 25. In Blender sind standardmäßig 24 eingestellt. Dies muss geändert werden. Genauso die Resolution.

Anti-Aliasing brauchen wir nicht. Deswegen kommt das Häkchen dort raus.
Als Output-Ordner nehmen wir etwas anderes als den Temp-Ordner.
Als Type wähle ich anstelle von PNG das in den VLC Informationen angezeigte H.264.
Bei Encoding aktiviere ich außerdem noch den Audio Codec, da ansonsten nichts zu hören wäre. Bei mir steht die Option, nach VLC, auf AAC.

Mit einem Druck auf den Knopf "Animation" ganz oben in den Render Properties beginnt die Erstellung des Videos. Dies kann ein wenig Zeit in Anspruch nehmen.

Hier ist das Ergebnis:

More Mice Stuff

$
0
0
My good old Logitech MouseMan Dual Optical got some problems. Pushing buttons yields in no-click, single-click or double-click. It is a typical long time use wearout. 


 Finally I got me a new mouse: a Logitech Trackman Marble.


Different. Right?
I tried it on Windows and …
Installed SetPoint software from Logitech. Works. But the special scroll options (push one of the smaller buttons and use the ball to scroll) won't work e.g. in games.
THANKS!
Searching around I found XMouseButtonControl which sets the buttons much better. Click and hold to scroll. And it even works in-game. Why isn't the manufacturer able to do that?

And then I tried the TrackMan on Linux. Plug-and-Play. Works. (And much faster then on Windows ^__^ ) Still I needed to set up the buttons. There are special pages for Ubuntu and Arch.

First I played around with the xinput thing and made a script:
#!/bin/sh

xinput set-button-map "Logitech USB Trackball" 1 8 3 4 5 6 7 2 9Emulation Button" 9
xinput set-int-prop "Logitech USB Trackball""Evdev Wheel Emulation" 8 1
xinput set-int-prop "Logitech USB Trackball""Evdev Wheel Emulation Button" 8 8
xinput set-int-prop "Logitech USB Trackball""Evdev Wheel Emulation Axes" 8 6 7 4 5
And then a little configuration for X11 lying
/usr/share/X11/xorg.conf.d/50-marblemouse.conf or
/etc/X11/xorg.conf.d/50-marblemouse.conf:
Section "InputClass"
    Identifier "Marble Mouse"
    MatchProduct "Logitech USB Trackball"
    MatchIsPointer "on"
    MatchDevicePath "/dev/input/event*"
    Driver "evdev"
    Option "SendCoreEvents""true"

    Option "Buttons""9"
    Option "ButtonMapping""1 8 3 4 5 6 7 2 9"
    Option "EmulateWheel""true"
    Option "EmulateWheelButton""8"
    Option "XAxisMapping""6 7"
    Option "YAxisMapping""4 5"
    Option "Emulate3Buttons""false"
EndSection
With those settings the little button left acts as the middle mouse button. And also as the one when pressed that the ball will act as scrollwheel. It even scrolls in 2D ^__^ .
That way it is much better then on Windows.

Still sometimes my systems acts a bit strange and puts my mice in power-saving mode. For that I made another script to always-on those:
#!/bin/sh

devIDs=$(grep -i logitech /sys/bus/usb/devices/*/manufacturer | grep -Po '[0-9]-[0-9]')
for devID in $devIDs
do
        echo "sudo sh -c \"echo on > /sys/bus/usb/devices/$devID/power/level\""
        sudo sh -c "echo on > /sys/bus/usb/devices/$devID/power/level"
done
It shouldn't be that hard to put those options & settings settable in something like KDEs systemsettings ;-)


And finally I found some new trackball-mouse on the internet!
The M-XT1URBK (en) which currently is only available from japan. The reviewsseemto be positive. Hopefully it will lose its teething problems and find its way around the globe.

[PHP+GDB] Debugging in PHP

$
0
0
Writing a server in Python that does SOAP and WSDL a simple PHP-client should be able to do requests. The WSDL is selfmade-generated in version 1.1. The analyzer on wsdl-analyzer.com is telling me that everything is OK. In fact I already have 3 clients in Python running, using SOAPpy, suds (jurko-edition) and twisted.web.soap (which is using SOAPpy). 

And 2 in PHP, one using pear SOAP and the other using the internal PHP SOAP.


First I tried the internal one and got "Could not find any usable binding services in WSDL." After lots of trying I wanted to test another library and found pear SOAP.
That one didn't work at first too.
 <?php
    require_once 'SOAP/Client.php';
    $wsdl = new SOAP_WSDL("http://localhost:8080/soap/?wsdl", array(), False);
    $client = $wsdl->getProxy();
This crashed in (/usr/share/php/)SOAP/WSDL.php:798 on 
eval($proxy);
Looking at the $proxy-string I saw generated PHP-code with classes and methods and so on, utilizing the names specified in the WSDL for variables etc. To bad those names contained dots ('.') because of how the WSDL-generator read its information from decorated classes and methods. Changing the generator to convert dots to double-underscorse ('__') helped.

And the normal PHP SOAP?
It still doesn't work. And still throws the same error message.
The code:
<?php
    $client = new SoapClient("http://localhost:8080/soap/?wsdl",
        array(
            'trace'=>True,
            'soap_version' => SOAP_1_1,
            'cache_wsdl' => WSDL_CACHE_NONE,
            'exceptions' => True,
            'features' => SOAP_SINGLE_ELEMENT_ARRAYS | SOAP_USE_XSI_ARRAY_TYPE)
    );
The error: 
PHP Fatal error:  SOAP-ERROR: Parsing WSDL: Could not find any usable binding services in WSDL. in soap_test_client.php on line 9
PHP Fatal error:  Uncaught SoapFault exception: [WSDL] SOAP-ERROR: Parsing WSDL: Could not find any usable binding services in WSDL. in soap_test_client.php:9
Stack trace:
#0 soap_test_client.php(9): SoapClient->SoapClient('http://localhos...', Array)
#1 {main}
  thrown in soap_test_client.php on line 9
Trying with a wrong URI I get a different error:
PHP Fatal error:  SOAP-ERROR: Parsing WSDL: Couldn't load from 'http://localhost:8080/SOAP/?wsdl' : failed to load external entity "http://localhost:8080/SOAP/?wsdl"
So the WSDL gets loaded from the server. The request is also visible in the server-log. Why is it having parsing problems?
Debugging this would be nice.
How to debug PHP code? Xdebug should work, I am told by looking for answers to this question. But it just works for own PHP code afaik. As it is not crashing in my but in internal compiled PHP code this is useless. GDB should be helpful I thought but a didn't really find anything useful about that combination. Some said GDB can't be utilized for debugging own PHP code. That I didn't want.
So I just tried it and got the following working:
gdb --args php -e soap_test_client.php
This will start GDB wanting to debug "php" with arguments set for it to "-e soap_test_client.php".
Useful commands for now are:
r | run -- run the program
b | break -- set a breakpoint
c | continue -- continue from a breakpoint
n | next -- go to the next line
s | step -- "step" inside the current line
q | quit -- quit the debugger
l | list -- list code lines
p | print -- print a variable or expression
Before running the program it is recommended to set at least one breakpoint. But where? The error-message is a good indication. Because the used PHP comes compiled the source code isn't there. On Debian apt-source helps:
apt-get source php5
That will download the source and patches and extract those in the current directory. On previous trail-and-error I already had found the function where the breakpoint should be and GDB wanted the source files being at:
/build/php5-MTNO_I/php5-5.6.15+dfsg
 On Specifying Source Directories from the GDB documentation it is said:
For example, suppose an executable references the file /usr/src/foo-1.0/lib/foo.c, and our source path is /mnt/cross. The file is first looked up literally; if this fails, /mnt/cross/usr/src/foo-1.0/lib/foo.c is tried; if this fails, /mnt/cross/foo.c is opened; if this fails, an error message is printed.
Assuming the PHP script is in ~/projects/php_soap_test/ and from the same directory the debugger is started the source files should be in ~/projects/php_soap_test/build/php5-MTNO_I/ 
With PHPs source download via apt-source being in ~/projects/php_source/ a symbolic link woks:
ln -s ~/projects/php_source/php5-5.6.15+dfsg ~/projects/php_soap_test/build/php5-MTNO_I/
The creation of missing directories might be needed (mkdir ~/projects/php_soap_test/build/php5-MTNO_I/). (There is also the dir-command in GDB that adds a directory to the path where sources are searched for.)

In the source directory of PHP a grep to the error message results in one interesting hit:
$ grep -Rn "Could not find any usable binding services in WSDL"
ext/soap/php_sdl.c:1171:                soap_error0(E_ERROR, "Parsing WSDL: Could not find any usable binding services in WSDL.");
Looking in the code and searching for a start the function in which this grep-hit shows up is:
731: static sdlPtr load_wsdl(zval *this_ptr, char *struri TSRMLS_DC)
There are now different possibilities to set the breakpoint:
b load_wsdl
break php_sdl.c:731
break /build/php5-MTNO_I/php5-5.6.15+dfsg/ext/soap/php_sdl.c:731
With the breakpoint set the program can be started/run. It will stop at the breakpoints where list can be used to see the code around the current point. Sometimes it is necessary to not just 'run' to the next line but to step inside the (mostly) function-call and trace what happens there. Looking at variables via print is also possible which includes contents of structs and dereferencing pointers and so on.


And now back inside the debugger finding out why PHP SOAP doesn't like my WSDL...

[PHP+GDB] Debugging in PHP Part 2

$
0
0
I found a little thing called Pyclewn which is "A Vim front-end to the gdb and pdb debuggers." With a good configured Vim it is for me much easier and nicer to debug then with plain gdb.


Installing Pyclewn is easy. Doing the "Quick start" was enough on my machine: http://pyclewn.sourceforge.net/install.html

What you need to do is nearly the same as doing it in gdb. First you start Vim. In there you start Pyclewn with thing to debug, like so:
:Pyclewn gdb --args php5 -e soap_test_client.php
To start gdb use ':Cecho'. Or start the debug-run with ':Crun'. Or insert breakpoints or do other stuff. Afaik most gdb-commands are found prepending the C, like Cecho, Crun, Cbreak, etc.
For me the important commands were:
:Cbreak -- set a breakpoint
:Crun -- start running the program
:Ccontinue -- continue from the current point
:Cnext -- go to next line
:Cstep -- step inside current line
:Cfinish -- finish current function and return
:Ckill -- stop the running program
:Cinfo breakpoints -- show set breakpoints
:Clist *$pc -- show current line (line where program counter is)
:Cdelete -- delete all breakpoints
:Chelp -- get help
Pyclewn
Pyclewn stopped at breakpoint and printing content

And finally I also found the bug that was causing errors on loading my WSDL in PHP SOAP:
a / at the end of an URI
In the PHP source code in ext/soap/php_encoding.h are strings defined for namespaces, prefixes and so on. It seams that most of them I had done right. But this one little thing, the soap-http, I had a / at the URI and PHP just wanted the string without it.

#define WSDL_HTTP_TRANSPORT "http://schemas.xmlsoap.org/soap/http"
vs.
'soap-http': "http://schemas.xmlsoap.org/soap/http/"
 
Nice... 
So, if you're getting a SOAP-ERROR on parsing WSDL in PHP, be sure to check if the namespaces are the same.

[Python+IPDB]

$
0
0
Tried to debug my code by inserting this line:
 import ipdb; ipdb.set_trace()
Got an error like this:
/usr/local/lib/python2.7/dist-packages/pkg_resources/__init__.py:2707: AttributeError

 E           AttributeError: _dep_map

 Found a comment that said:
Ah, that means the real AttributeError is happening inside of the @property; the AttributeError being raised is after the fallback. Unfortunately, due to the way Python's attribute handling works, if there's an attribute error raised by a property getter, and the object has a __getattr__, then the real error is discarded and the __getattr__ is called instead.
So whatever error you're getting needs to be tracked down inside the @property;

Stepping through the code I found another error:
*** AttributeError: 'module' object has no attribute '_subx'
Which came from:
> /usr/lib/python2.7/re.py(155)sub()
-> return _compile(pattern, flags).sub(repl, string, count)

(Pdb) pattern
<_sre.SRE_Pattern object at 0xb6afb270>
(Pdb) flags
0
(Pdb) ccc = _compile(pattern, flags)
(Pdb) ccc
<_sre.SRE_Pattern object at 0xb6afb270>
(Pdb) repl
'\\1==\\2\\3'
(Pdb) string
'importlib'
(Pdb) count
0
(Pdb) ccc.sub(repl, string, count)
*** AttributeError: 'module' object has no attribute '_subx'
Something seemed wrong with the regex-lib. After removing the extra regex-lib via:
sudo python2.7 -mpip uninstall regex
I can use ipdb in my code again.


But was it really that regex-lib? On other code I could use ipdb without a problem. From the commented issue the solution was to change a custom parser-lib. So it may be something totally different for you. Look out for the exception-information from the _dep_map-property
@property
def _dep_map(self):
most probably from an exception inside the exception handling.

[Python] From Threads to ThreadPool to Gevent

$
0
0
A system test I wrote does many requests on a local server. The responses take from some to many seconds to arrive. IO-bound. I thought I should use threads for each request. All requests could start at the same time and when the results are in they could be evaluated. 
It worked. Lots of threads were created, did their work and died.
To many threads - one would say.
A threadpool should be a better way...


The first thing I learned was: there are no threadpools in Python 2.7
I wondered because I used threadpools in Python. But those were the ones in Python 3. There is a pool in multiprocessing, but have fun exchanging data that way. Or sharing code and states. A short try resulted in errors saying that some classes could not be found. Why? Because it was defined later then the processes were created. So I would have needed to create the processpool much later. Possible, but not what I wanted. I didn't even want processes. Why should I use processes to do some little requests in parallel?

A threadpool it should be. And because there weren't want in standard Python I thought of creating one myself.
A threadpool creates a number of threads in the beginning and destroys them in the end. Work is given to the threadpool from where the threads are fed. In my case there is a queue where work in form of a function is put in. The worker-threads are waiting via a 'get' on the queue for work. The queue itself is threadsafe, so only one worker will get the work.
Results from work or info about being done with a work is done via another queue and an Event-object. In the threadpool a thread doesn't finish and won't return its result by itself. Another queue is needed for that. As noone knows when work is done, results can come in in a different order then it is given out. For that a simple counter will give a number to each work. The id will be given to the thread and return from the thread with the result. The threadpool then needs to put back the result to the request and give that to the caller.
The threading.Event object is extended to help with that. When work is coming to the threadpool a new Event is put in a dict with a unique number. The number for identification of in-coming work and outgoing results. The event is returned. It's wait-method is changed so it waits for the result and returns it.
To handle the result-events there is another thread. It looks for results and sets the corresponding event.
Because all threads are waiting on queues on a shutdown of the threadpool each thread needs to get notified, which is done with a special package that is put for each thread in the queues.


The code looks like this:
import threading
import Queue
import itertools


class ThreadEnd(object):
    pass

tid = itertools.count()

class Thread(threading.Thread):

    def __init__(self, threadpool_id, queue_in, queue_out):
        self.tpid = threadpool_id
        self.tid = next(tid)
        print("[{}] ({}) New thread".format(self.tpid, self.tid))
        self.queue_in = queue_in
        self.queue_out = queue_out
        super(Thread, self).__init__()

    def run(self):
        print("[{}] ({}) Run thread".format(self.tpid, self.tid))
        while True:
            print("[{}] ({})Get thread in".format(self.tpid, self.tid))
            request_id, item = self.queue_in.get()
            print("[{}] ({}) Get thread out".format(self.tpid, self.tid))
            if isinstance(item, ThreadEnd):
                print("[{}] ({}) Put thread in 1".format(self.tpid, self.tid))
                self.queue_out.put((request_id, None))
                print("[{}] ({}) Put thread out 1".format(self.tpid, self.tid))
                return
            else:
                print("[{}] ({}) In Thread: {} {}".format(self.tpid, self.tid, item, item))
                result = item()
                print("[{}] ({}) Put thread in 2".format(self.tpid, self.tid))
                self.queue_out.put((request_id, result))
                print("[{}] ({}) Put thread out 2".format(self.tpid, self.tid))

eid = itertools.count()

class Event(object):

    def __init__(self, tpid):
        self.tpid = tpid
        self.eid = next(eid)
        print("[{}] {{{}}} New Event".format(self.tpid, self.eid))
        self.result = None
        self.event = threading.Event()

    def set(self, result):
        print("[{}] {{{}}} Set Event: {}".format(self.tpid, self.eid, result))
        self.result = result
        self.event.set()

    def wait(self):
        print("[{}] {{{}}} Wait Event".format(self.tpid, self.eid))
        self.event.wait()
        return self.result


tpid = itertools.count()

class ThreadPool(object):

    def __init__(self, num_threads):
        self.tpid = next(tpid)
        self.num_threads = num_threads
        print("[{}] ThreadPool with {} threads.".format(self.tpid, self.num_threads))
        self.queue_in = Queue.LifoQueue()
        self.queue_out = Queue.Queue()
        self.ids = itertools.count()
        self.results = {}
        self.stopping = False
        self.threads = [Thread(self.tpid, self.queue_in, self.queue_out) for _ in range(self.num_threads)]
        [thread.start() for thread in self.threads]

        self.fetcher = threading.Thread(target=self.fetch_results)
        self.fetcher.start()

    def stop(self):
        print("[{}] Stopping threadpool...".format(self.tpid))
        self.stopping = True
        [self.queue_in.put((-1, ThreadEnd())) for _ in self.threads]
        [thread.join() for thread in self.threads]
        self.fetcher.join()

    def workon(self, function):
        print("[{}] Threadpool: workon {}".format(self.tpid, function))
        request_id = next(self.ids)
        self.results[request_id] = Event(self.tpid)
        self.queue_in.put((request_id, function))
        return self.results[request_id]

    def fetch_results(self):
        print("[{}] Fetching in threadpool...".format(self.tpid))
        while not self.stopping or not self.queue_out.empty():
            print("[{}] Fetching in".format(self.tpid))
            request_id, result = self.queue_out.get()
            print("[{}] Fetching out".format(self.tpid, request_id))
            print("[{}] stopping: {} ; empty: {}".format(self.tpid, self.stopping, self.queue_out.empty()))
            self.results.pop(request_id, Event(self.tpid)).set(result)


threadpool = ThreadPool(8)
threads = [threadpool.workon(f) for f in functions]
[thread.wait() for thread in threads]
threadpool.stop()

It worked!

Kind of.

When I tried to use one threadpool and put all work in that I overlooked, that some work was created inside some threads. And when they decided to wait for the results, the threads itself would wait. And nothing happened anymore. With a threadpool for each layer that problem was solved. But not as nice as I would like it to be. 
E.g.
  • using multiple threadpools
  • having to define pool sizes
  • having a maximum number of threads
  • GIL
Stackless, greenlet, "Microthreads" - should work in this situation much better, I heard/read. Gevent seemed to be the one.

Installing it via pip was easy. 
Using it, too:
import gevent
import gevent.monkey

gevent.monkey.patch_all()

jobs = [gevent.spawn(f) for f in funcs]
gevent.wait(jobs)
# threads = [threadpool.workon(f) for f in funcs]
# [thread.wait() for thread in threads]
Easy.
Right?

It's not a solution if you need real threads and the horsepower of all cores, but nice and easy if you don't want to wait one each IO-bound operation.

X Rebirth 4.0 Demo

$
0
0
X Rebirth just got an update and a new DLC: http://forum.egosoft.com/viewtopic.php?t=387349

And a demo.
And now fully support for Linux and Mac.

Looking a the steam page I thought my old PC couldn't handle the game:
    Minimum:
    • OS: SteamOS (64-bit) or Ubuntu 14.04 (64-bit)
    • Processor: Intel i-Series at 2GHz or AMD equivalent
    • Memory: 8 GB RAM
    • Graphics: Vendor proprietary drivers, Nvidia GT500 series with 1GB RAM or better, ATI 5870HD with 1GB RAM or better
    • Storage: 8 GB available space
    • Sound Card: OpenAL Soft compatible
    • Additional Notes: OpenGL version 4.2
But why not try?
steam://install/433860
http://store.steampowered.com/app/2870

My current system:
$ uname -a
Linux Dragon 4.5.0-rc4-amd64 #1 SMP Debian 4.5~rc4-1~exp1 (2016-02-18) x86_64 GNU/Linux

$ glxinfo
Extended renderer info (GLX_MESA_query_renderer):
    Vendor: X.Org (0x1002)
    Device: AMD RV740 (DRM 2.43.0, LLVM 3.7.1) (0x94b3)
    Version: 11.1.2
    Accelerated: yes
    Video memory: 512MB
OpenGL vendor string: X.Org
OpenGL renderer string: Gallium 0.4 on AMD RV740 (DRM 2.43.0, LLVM 3.7.1)
OpenGL core profile version string: 3.3 (Core Profile) Mesa 11.1.2
OpenGL core profile shading language version string: 3.30

$ lscpu
Architecture:          x86_64
CPU(s):                4
Model name:            AMD Phenom(tm) II X4 905e Processor
CPU max MHz:           2500,0000

$ free -h
              total
Mem:           5,8G


Let's compare:
OS? Check.
CPU? Check.
Memory? Nope.
GPU? Nope.
OpenGL? Nope.

But it works!


Sometimes it lags. Mostly when loading new areas, which happens often in the fast-travel-tube.


X3: Terran Conflict works a bit "meeh" on the same system.
    Recommended:
    • OS: Ubuntu 12.04 lts
    • Processor: Intel® Core™ 2 Duo or AMD® equivalent at 2.0 GHz
    • Memory: 3 GB RAM
    • Graphics:"512MB OpenGL 3.0+ discrete NVIDIA/AMD card (with proprietary driver)"
    • Hard Drive: 10GB of free space 
Everything check. Even a better CPU and more RAM.  It just uses one core. And the GPU idles with SINZA 600% at about 10-13% each in radeontop. The fps then are at 5-10. Without the timeboost the fps and GPU-usage went up to playable framerates. Still the GPU could handle a lot more. Thinking back when I used fglrx that was indeed the fact. I had more fps and even with SINZA everything was smooth.
Drivers… :-(

[QDBUS] Create tabs in yakuake and pidgin, not dolphin

$
0
0
QDBus is an easier way to interact with DBus then using dbus-send. There is also a GUI qdbusviewer that might help finding and executing stuff. But qdbus and grep seem to be a bit better at that for me.

Executing qdbus will show all services that you can talk to via dbus. Given a servicename it will print possible paths and sub-paths. And when a path is also appended then it will print out methods and signals which can be called or registered to. The output will include the names and types of parameters and the return-type.


Yakuake - Let's find it:
$ qdbus | grep yakuake
 org.kde.yakuake
$ qdbus org.kde.yakuake
/
/MainApplication
/Sessions
/Sessions/1
/Sessions/2
/Sessions/3
/Sessions/4
/Sessions/7
/Sessions/8
/Windows
/Windows/1
/Windows/2
/Windows/3
/Windows/4
/Windows/7
/Windows/8
/org
/org/kde
/org/kde/yakuake
/yakuake
/yakuake/sessions
/yakuake/tabs
/yakuake/window
You see the missing 5 and 6 in Sessions and Windows? That is because I already closed them and yakuake is not reusing those numbers but continues its numbering.
For now /Sessions/1 and /yakuake/sessions are the paths we need.
$ qdbus org.kde.yakuake /Sessions/1
method QByteArray org.kde.konsole.Session.codec()
method QStringList org.kde.konsole.Session.environment()
method bool org.kde.konsole.Session.flowControlEnabled()
method int org.kde.konsole.Session.foregroundProcessId()
method int org.kde.konsole.Session.historySize()
method bool org.kde.konsole.Session.isMonitorActivity()
method bool org.kde.konsole.Session.isMonitorSilence()
method int org.kde.konsole.Session.processId()
method void org.kde.konsole.Session.runCommand(QString command)
method void org.kde.konsole.Session.sendMouseEvent(int buttons, int column, int line, int eventType)
method void org.kde.konsole.Session.sendText(QString text)
method bool org.kde.konsole.Session.setCodec(QByteArray codec)
method void org.kde.konsole.Session.setEnvironment(QStringList environment)
method void org.kde.konsole.Session.setFlowControlEnabled(bool enabled)
method void org.kde.konsole.Session.setHistorySize(int lines)
method void org.kde.konsole.Session.setMonitorActivity(bool)
method void org.kde.konsole.Session.setMonitorSilence(bool)
method void org.kde.konsole.Session.setMonitorSilenceSeconds(int seconds)
method void org.kde.konsole.Session.setTabTitleFormat(int context, QString format)
method void org.kde.konsole.Session.setTitle(int role, QString title)
method QString org.kde.konsole.Session.shellSessionId()
method QString org.kde.konsole.Session.tabTitleFormat(int context)
method QString org.kde.konsole.Session.title(int role)
method QDBusVariant org.freedesktop.DBus.Properties.Get(QString interface_name, QString property_name)
method QVariantMap org.freedesktop.DBus.Properties.GetAll(QString interface_name)
signal void org.freedesktop.DBus.Properties.PropertiesChanged(QString interface_name, QVariantMap changed_properties, QStringList invalidated_properties)
method void org.freedesktop.DBus.Properties.Set(QString interface_name, QString property_name, QDBusVariant value)
method QString org.freedesktop.DBus.Introspectable.Introspect()
method QString org.freedesktop.DBus.Peer.GetMachineId()
method void org.freedesktop.DBus.Peer.Ping()
$ qdbus org.kde.yakuake /yakuake/sessions
method int org.kde.yakuake.activeSessionId()
method int org.kde.yakuake.activeTerminalId()
method int org.kde.yakuake.addSession()
method int org.kde.yakuake.addSessionQuad()
method int org.kde.yakuake.addSessionTwoHorizontal()
method int org.kde.yakuake.addSessionTwoVertical()
method bool org.kde.yakuake.hasTerminalsWithKeyboardInputDisabled(int sessionId)
method bool org.kde.yakuake.hasTerminalsWithKeyboardInputEnabled(int sessionId)
method bool org.kde.yakuake.hasTerminalsWithMonitorActivityDisabled(int sessionId)
method bool org.kde.yakuake.hasTerminalsWithMonitorActivityEnabled(int sessionId)
method bool org.kde.yakuake.hasTerminalsWithMonitorSilenceDisabled(int sessionId)
method bool org.kde.yakuake.hasTerminalsWithMonitorSilenceEnabled(int sessionId)
method bool org.kde.yakuake.hasUnclosableSessions()
method bool org.kde.yakuake.isSessionClosable(int sessionId)
method bool org.kde.yakuake.isSessionKeyboardInputEnabled(int sessionId)
method bool org.kde.yakuake.isSessionMonitorActivityEnabled(int sessionId)
method bool org.kde.yakuake.isSessionMonitorSilenceEnabled(int sessionId)
method bool org.kde.yakuake.isTerminalKeyboardInputEnabled(int terminalId)
method bool org.kde.yakuake.isTerminalMonitorActivityEnabled(int terminalId)
method bool org.kde.yakuake.isTerminalMonitorSilenceEnabled(int terminalId)
method void org.kde.yakuake.raiseSession(int sessionId)
method void org.kde.yakuake.removeSession(int sessionId)
method void org.kde.yakuake.removeTerminal(int terminalId)
method void org.kde.yakuake.runCommand(QString command)
method void org.kde.yakuake.runCommandInTerminal(int terminalId, QString command)
method int org.kde.yakuake.sessionIdForTerminalId(int terminalId)
method QString org.kde.yakuake.sessionIdList()
method void org.kde.yakuake.setSessionClosable(int sessionId, bool closable)
method void org.kde.yakuake.setSessionKeyboardInputEnabled(int sessionId, bool enabled)
method void org.kde.yakuake.setSessionMonitorActivityEnabled(int sessionId, bool enabled)
method void org.kde.yakuake.setSessionMonitorSilenceEnabled(int sessionId, bool enabled)
method void org.kde.yakuake.setTerminalKeyboardInputEnabled(int terminalId, bool enabled)
method void org.kde.yakuake.setTerminalMonitorActivityEnabled(int terminalId, bool enabled)
method void org.kde.yakuake.setTerminalMonitorSilenceEnabled(int terminalId, bool enabled)
method int org.kde.yakuake.splitSessionLeftRight(int sessionId)
method int org.kde.yakuake.splitSessionTopBottom(int sessionId)
method int org.kde.yakuake.splitTerminalLeftRight(int terminalId)
method int org.kde.yakuake.splitTerminalTopBottom(int terminalId)
method QString org.kde.yakuake.terminalIdList()
method QString org.kde.yakuake.terminalIdsForSessionId(int sessionId)
method int org.kde.yakuake.tryGrowTerminalBottom(int terminalId)
method int org.kde.yakuake.tryGrowTerminalBottom(int terminalId, uint pixels)
method int org.kde.yakuake.tryGrowTerminalLeft(int terminalId)
method int org.kde.yakuake.tryGrowTerminalLeft(int terminalId, uint pixels)
method int org.kde.yakuake.tryGrowTerminalRight(int terminalId)
method int org.kde.yakuake.tryGrowTerminalRight(int terminalId, uint pixels)
method int org.kde.yakuake.tryGrowTerminalTop(int terminalId)
method int org.kde.yakuake.tryGrowTerminalTop(int terminalId, uint pixels)
method QDBusVariant org.freedesktop.DBus.Properties.Get(QString interface_name, QString property_name)
method QVariantMap org.freedesktop.DBus.Properties.GetAll(QString interface_name)
signal void org.freedesktop.DBus.Properties.PropertiesChanged(QString interface_name, QVariantMap changed_properties, QStringList invalidated_properties)
method void org.freedesktop.DBus.Properties.Set(QString interface_name, QString property_name, QDBusVariant value)
method QString org.freedesktop.DBus.Introspectable.Introspect()
method QString org.freedesktop.DBus.Peer.GetMachineId()
method void org.freedesktop.DBus.Peer.Ping()
We have some possibilities to do what we want. We know that after starting yakuake we have a session 1. We can already put some stuff in there. Either execute a command or insert some text. This is done either in /Sessions/1 via
method void org.kde.konsole.Session.runCommand(QString command)
method void org.kde.konsole.Session.sendText(QString text)
 or in /yakuake/sessions via
 method void org.kde.yakuake.runCommandInTerminal(int terminalId, QString command)
Executing a command in session 1 will be:
qdbus org.kde.yakuake /yakuake/sessions runCommandInTerminal 0 "echo \"Hello World!\""
or
qdbus org.kde.yakuake /Sessions/1 org.kde.konsole.Session.runCommand"echo \"Hello World!\""
The terminalId is 0. One less then the session number.
Let's add another session and put something on the line without executing it:
qdbus org.kde.yakuake /yakuake/sessions org.kde.yakuake.addSession
qdbus org.kde.yakuake /Sessions/2 org.kde.konsole.Session.sendText "# Hello World!"
Running a command seems to do nothing more special then putting the command on the line and "pushing" return. At least it is working when I do stuff like:
qdbus org.kde.yakuake /Sessions/1 org.kde.konsole.Session.runCommand "sudo echo \"Hello World!\""
qdbus org.kde.yakuake /Sessions/1 org.kde.konsole.Session.runCommand "my_awesome_password"
 or
qdbus org.kde.yakuake /Sessions/1 org.kde.konsole.Session.runCommand "ipython"
qdbus org.kde.yakuake /Sessions/1 org.kde.konsole.Session.runCommand "import os"

qdbus org.kde.yakuake /Sessions/1 org.kde.konsole.Session.runCommand "print(os.path.curdir)"

Pidgin:
$ qdbus | grep pidgin
 im.pidgin.purple.PurpleService
$ qdbus im.pidgin.purple.PurpleService
/
/im
/im/pidgin
/im/pidgin/purple
/im/pidgin/purple/PurpleObject
$ qdbus im.pidgin.purple.PurpleService /im/pidgin/purple/PurpleObject
# too much output ...
method int im.pidgin.purple.PurpleInterface.PurpleAccountsFind(QString name, QString protocol)
method int im.pidgin.purple.PurpleInterface.PurpleAccountsFindAny(QString name, QString protocol)
method QDBusRawType::ai im.pidgin.purple.PurpleInterface.PurpleAccountsGetAll()
method int im.pidgin.purple.PurpleInterface.PurpleConversationNew(int type, int account, QString name)
method QString im.pidgin.purple.PurpleInterface.PurpleAccountGetProtocolId(int account)
method QString im.pidgin.purple.PurpleInterface.PurpleAccountGetProtocolName(int account)
method QString im.pidgin.purple.PurpleInterface.PurpleAccountGetUsername(int account)
# too much output ...
For pidgin we do a bit more to open new conversations. First get the number of your account and then open a new conversation window. Do you know the account name and protocol? Then use PurpleAccountsFind. I thought I knew but couldn't find a thing. With PurpleAccountsGetAll I found the numbers to all accounts. Put a number in PurpleAccountGetUsername and
PurpleAccountGetProtocolId (and not PurpleAccountGetProtocolName) and you will have the account name and protocol that can be used in PurpleAccountsFind.

To open a new conversation with your buddy you need his(her) name. Either check pidgin or got through all numbers found in  im.pidgin.purple.PurpleInterface.PurpleBlistGetBuddies and get their names via im.pidgin.purple.PurpleInterface.PurpleBlistGetBuddies.

Finally use PurpleConversationNew to create the window/tab:
PURPLE_CONV_TYPE_IM=1
ACCOUNT=`qdbus im.pidgin.purple.PurpleService /im/pidgin/purple/PurpleObject PurpleAccountsFind "my_name@my.host/ressource""prpl-jabber"`
qdbus im.pidgin.purple.PurpleService im.pidgin.purple.PurpleInterface.PurpleConversationNew $PURPLE_CONV_TYPE_IM $ACCOUNT "my_buddy@my.host"

Dolphin:
$ qdbus | grep dolphin
 org.kde.dolphin-6364
 org.kde.dolphin-6371
 org.kde.dolphin-32069
There it is. The first problem. There is not just "the" dolphin. Each window has its own PID.
$ ps aux | grep dolphin
 user  6364  0.0  0.2 544824 35600 ?        Sl   12:40   0:14 /usr/bin/dolphin --daemon
 user  6371  0.0  0.6 723668 78716 ?        Sl   12:50   4:46 /usr/bin/dolphin
 user 32069  0.0  0.6 678496 73300 ?        Sl   12:53   0:02 /usr/bin/dolphin
And one of them even is a daemon. Not an open window.
$ qdbus org.kde.dolphin-32069
/
/FileUndoManager
/MainApplication
/dolphin
/dolphin/Dolphin_1
/dolphin/Dolphin_1/actions
/dolphin/Dolphin_1/actions/new_window
/dolphin/Dolphin_1/actions/new_tab
/dolphin/Dolphin_1/actions/close_tab
/dolphin/Dolphin_1/actions/file_quit
/dolphin/Dolphin_1/actions/edit_undo
/dolphin/Dolphin_1/actions/edit_cut
/dolphin/Dolphin_1/actions/edit_copy
/dolphin/Dolphin_1/actions/edit_paste
/dolphin/Dolphin_1/actions/edit_find
/dolphin/Dolphin_1/actions/select_all
/dolphin/Dolphin_1/actions/invert_selection
/dolphin/Dolphin_1/actions/split_view
/dolphin/Dolphin_1/actions/reload
/dolphin/Dolphin_1/actions/stop
/dolphin/Dolphin_1/actions/editable_location
/dolphin/Dolphin_1/actions/replace_location
/dolphin/Dolphin_1/actions/go_back
/dolphin/Dolphin_1/actions/undo_close_tab
/dolphin/Dolphin_1/actions/go_forward
/dolphin/Dolphin_1/actions/go_up
/dolphin/Dolphin_1/actions/go_home
/dolphin/Dolphin_1/actions/show_filter_bar
/dolphin/Dolphin_1/actions/compare_files
/dolphin/Dolphin_1/actions/open_terminal
/dolphin/Dolphin_1/actions/options_show_menubar
/dolphin/Dolphin_1/actions/options_configure
/dolphin/Dolphin_1/actions/activate_next_tab
/dolphin/Dolphin_1/actions/activate_prev_tab
/dolphin/Dolphin_1/actions/open_in_new_tab
/dolphin/Dolphin_1/actions/open_in_new_tabs
/dolphin/Dolphin_1/actions/open_in_new_window
/dolphin/Dolphin_1/actions/create_dir
/dolphin/Dolphin_1/actions/rename
/dolphin/Dolphin_1/actions/move_to_trash
/dolphin/Dolphin_1/actions/delete
/dolphin/Dolphin_1/actions/delete_shortcut
/dolphin/Dolphin_1/actions/properties
/dolphin/Dolphin_1/actions/icons
/dolphin/Dolphin_1/actions/compact
/dolphin/Dolphin_1/actions/details
/dolphin/Dolphin_1/actions/view_mode
/dolphin/Dolphin_1/actions/view_zoom_in
/dolphin/Dolphin_1/actions/view_zoom_out
/dolphin/Dolphin_1/actions/show_preview
/dolphin/Dolphin_1/actions/descending
/dolphin/Dolphin_1/actions/folders_first
/dolphin/Dolphin_1/actions/sort_by_text
/dolphin/Dolphin_1/actions/sort_by_size
/dolphin/Dolphin_1/actions/sort_by_date
/dolphin/Dolphin_1/actions/sort_by_type
/dolphin/Dolphin_1/actions/sort_by_rating
/dolphin/Dolphin_1/actions/sort_by_tags
/dolphin/Dolphin_1/actions/sort_by_comment
/dolphin/Dolphin_1/actions/Dokument
/dolphin/Dolphin_1/actions/Bild
/dolphin/Dolphin_1/actions/Audio
/dolphin/Dolphin_1/actions/Weitere
/dolphin/Dolphin_1/actions/sort
/dolphin/Dolphin_1/actions/show_size
/dolphin/Dolphin_1/actions/show_date
/dolphin/Dolphin_1/actions/show_type
/dolphin/Dolphin_1/actions/show_rating
/dolphin/Dolphin_1/actions/show_tags
/dolphin/Dolphin_1/actions/show_comment
/dolphin/Dolphin_1/actions/Dokument
/dolphin/Dolphin_1/actions/Bild
/dolphin/Dolphin_1/actions/Audio
/dolphin/Dolphin_1/actions/Weitere
/dolphin/Dolphin_1/actions/additional_info
/dolphin/Dolphin_1/actions/show_in_groups
/dolphin/Dolphin_1/actions/show_hidden_files
/dolphin/Dolphin_1/actions/view_properties
/dolphin/Dolphin_1/actions/lock_panels
/dolphin/Dolphin_1/actions/show_information_panel
/dolphin/Dolphin_1/actions/show_folders_panel
/dolphin/Dolphin_1/actions/show_terminal_panel
/dolphin/Dolphin_1/actions/show_places_panel
/dolphin/Dolphin_1/actions/options_configure_keybinding
/dolphin/Dolphin_1/actions/options_configure_toolbars
/org
/org/freedesktop
/org/freedesktop/FileManager1
/org/kde
/org/kde/dolphin
How is this supposed to be used with qdbus?
$ qdbus org.kde.dolphin-32069 /dolphin/Dolphin_1/actions/new_tab
property readwrite bool org.qtproject.Qt.QAction.autoRepeat
property readwrite bool org.qtproject.Qt.QAction.checkable
property readwrite bool org.qtproject.Qt.QAction.checked
property readwrite bool org.qtproject.Qt.QAction.enabled
property readwrite QString org.qtproject.Qt.QAction.iconText
property readwrite bool org.qtproject.Qt.QAction.iconVisibleInMenu
property readwrite int org.qtproject.Qt.QAction.menuRole
property readwrite int org.qtproject.Qt.QAction.priority
property readwrite int org.qtproject.Qt.QAction.shortcutContext
property readwrite QString org.qtproject.Qt.QAction.statusTip
property readwrite QString org.qtproject.Qt.QAction.text
property readwrite QString org.qtproject.Qt.QAction.toolTip
property readwrite bool org.qtproject.Qt.QAction.visible
property readwrite QString org.qtproject.Qt.QAction.whatsThis
method void org.qtproject.Qt.QAction.hover()
method void org.qtproject.Qt.QAction.setChecked(bool)
method void org.qtproject.Qt.QAction.setDisabled(bool b)
method void org.qtproject.Qt.QAction.setEnabled(bool)
method void org.qtproject.Qt.QAction.setVisible(bool)
method void org.qtproject.Qt.QAction.toggle()
method void org.qtproject.Qt.QAction.trigger()
method QDBusVariant org.freedesktop.DBus.Properties.Get(QString interface_name, QString property_name)
method QVariantMap org.freedesktop.DBus.Properties.GetAll(QString interface_name)
signal void org.freedesktop.DBus.Properties.PropertiesChanged(QString interface_name, QVariantMap changed_properties, QStringList invalidated_properties)
method void org.freedesktop.DBus.Properties.Set(QString interface_name, QString property_name, QDBusVariant value)
method QString org.freedesktop.DBus.Introspectable.Introspect()
method QString org.freedesktop.DBus.Peer.GetMachineId()
method void org.freedesktop.DBus.Peer.Ping()
I can trigger this and it will open a new tab. But how to change its location? replace_location ? I can trigger that one too. It will mark the location for change. But then I would need to click and change it myself. Not what is wanted.

There is this other path:
$ qdbus org.kde.dolphin-32069 /org/kde/dolphin
method void org.freedesktop.Application.Activate(QVariantMap platform-data)
method void org.freedesktop.Application.ActivateAction(QString action_name, QVariantList parameter, QVariantMap platform-data)
method void org.freedesktop.Application.Open(QStringList uris, QVariantMap platform-data)
method int org.kde.KDBusService.CommandLine(QStringList arguments, QString working-dir, QVariantMap platform-data)
method QDBusVariant org.freedesktop.DBus.Properties.Get(QString interface_name, QString property_name)
method QVariantMap org.freedesktop.DBus.Properties.GetAll(QString interface_name)
signal void org.freedesktop.DBus.Properties.PropertiesChanged(QString interface_name, QVariantMap changed_properties, QStringList invalidated_properties)
method void org.freedesktop.DBus.Properties.Set(QString interface_name, QString property_name, QDBusVariant value)
method QString org.freedesktop.DBus.Introspectable.Introspect()
method QString org.freedesktop.DBus.Peer.GetMachineId()
method void org.freedesktop.DBus.Peer.Ping()
where ActivateAction looks promissing. But trying something gives me an error:
$ qdbus org.kde.dolphin-32069 /org/kde/dolphin org.freedesktop.Application.ActivateAction new_tab "("")"""
Sorry, can't pass arg of type 'QVariantMap'.
The internet seems to say that that type is not supported by qdbus:
https://forum.kde.org/viewtopic.php?f=17&t=85292
http://doc.qt.io/qt-5.7/qdbustypesystem.html

Meeh.

At least you can append URLs to dolphin on the commandline the open them all in tabs:
dolphin ~ ~/Downloads ~/Projects ~/Pictures ~/FooBar

Final notes - using dbus-send:
dbus-send --print-reply  --session --dest=org.kde.yakuake /yakuake/sessions org.kde.yakuake.addSession

Now put those lines together in a script, execute it and it will open all your needed tabs at the right places with the right tools and prefilled commands. Just like this:
#!/bin/sh

qdbus org.kde.yakuake /Sessions/1 org.kde.konsole.Session.runCommand "echo \"
This could be your text.\""
qdbus org.kde.yakuake /Sessions/1 org.kde.konsole.Session.sendText "# This could be your text."

qdbus org.kde.yakuake /yakuake/sessions org.kde.yakuake.addSession
qdbus org.kde.yakuake /yakuake/sessions runCommandInTerminal 1 "jupyter-notebook"

qdbus org.kde.yakuake /yakuake/sessions org.kde.yakuake.addSession
qdbus org.kde.yakuake /yakuake/sessions runCommandInTerminal 2 "ipython"

qdbus org.kde.yakuake /yakuake/sessions org.kde.yakuake.addSession
qdbus org.kde.yakuake /Sessions/4 org.kde.konsole.Session.runCommand "vim -S ~/session.vim"


dolphin ~ ~/Downloads ~/Pictures ~/Projects &

account=`qdbus im.pidgin.purple.PurpleService /im/pidgin/purple/PurpleObject PurpleAccountsFind "admin@my.project.com/FooBar""prpl-jabber"`
PURPLE_CONV_TYPE_IM=1
qdbus --literal im.pidgin.purple.PurpleService /im/pidgin/purple/PurpleObject PurpleConversationNew $PURPLE_CONV_TYPE_IM $account "co-worker-1@my.project.com"
qdbus --literal im.pidgin.purple.PurpleService /im/pidgin/purple/PurpleObject PurpleConversationNew $PURPLE_CONV_TYPE_IM $account "co-worker-2@my.project.com"
qdbus --literal im.pidgin.purple.PurpleService /im/pidgin/purple/PurpleObject PurpleConversationNew $PURPLE_CONV_TYPE_IM $account "co-worker-3@my.project.com"

Ryzen on Linux - Waiiting

$
0
0
Finally!
All needed components are here. Build together. Set up. And running.


22.03.2017 - AMD Ryzen gets a launchdate and can be preodered

I was waiting for this for a long time. On 25.03.2017 I had all components chosen that should join together as my new PC. And so I ordered them all from Mindfactory.
The waiting began.
2 days later the first item was on the go: AOC AGON AG271QX (more)
It arrived on 02.03.2017. With the hardware I had I couldn't test it properly. The NVIDIA GeForce 8400M GS of a Laptop powered by Debian Testing just got 1920x1080@60Hz over HDMI and 1024x768@120Hz and the MacBook 2560x1440@60Hz. It worked and had no visual problems. So far so good.

Because of preordering and Mindfactory not having the special edition of the chosen cooler I needed to ask Noctua for the mounting-kit. That I did on the 27.02.2017. Without extra cost and problems it arrived the week after.
A big thanks to Noctua.

05.03.2017 - news from Mindfactory: "Wir bedauern Ihnen mitteilen zu müssen, dass sich die Lieferung noch etwas verzögert".
The pain began. The mainboard was missing. Next date they should get a new charge should be the 10.03. At that date I checked the page and now it said 17.03. and other components, front-panel, speaker, buttons, were missing. "??" - when I selected the things I wanted I checked that all were available... and now they were gone.
I exchanged some emails with them. And waited a week more.
On 15.03. I asked them again and except for the mainboard just the speaker-buttons-leds-set were missing. So I changed them for another set.
Artikelnummer: 8356053
Lian Li Power-/Reset- Taster
(http://www.mindfactory.de/product_info.php/Lian-Li-Power--Reset--Taster-fuer-Lian-Li-PC-60-Plus-II--PT-SK09B-_718062.html)
for

Artikelnummer: 7821720
InLine Testset 5-teilig Adapter
(http://www.mindfactory.de/product_info.php/InLine-Testset-5-teilig-Adapter-fuer-Mainboards--59910-_161548.html)
On 17.03. I found a mail about shipping things.
"Yes!" - I thought. And checked. And saw:
They send the rest - but mainboard and the testset was not included.
What?!
Those were now marked shippable on 31.03.
What?!
And checking 8356053 it was available again.
What?!

Checking reddit I knew that the boards were rare everywhere in the world.
Still I had some anger in me and wrote them.
As my board were nowhere available I could have chosen another or wait longer. I choose to wait more. And asked if they could change back my change, 7821720 to 8356053 again.
It was not possible. Why?
"Leider ist dieses noch nicht aktualisiert. Der Artikel ist nur noch verfügbar und nicht lagernd."
"??" What?
 Okay. Wrong values on there webpage. Again...

So more waiting...

And while checking reddit I saw a post on 29.03. about mainboards in stock.
I checked my local reseller and WOW! there it was too. I thought a bit about it. Asked some friends. And went to get it. The only one in store. They had other, including 2 K7. But only one 5. And I got it.
And I was sooo happy :-D

In the evening I finally could unbox all parts and put them together.
It works!

I canceled the order on Mindfactory.
And checking on 31.03. it is now listed for 13.04.
Wow...
Just glad I got mine now.
And the testset is now also on the way.
The last pieces.

Or nearly last pieces because the case is still missing.
It shall be a custom case. Wooden. With acrylic glass. Because the hardware looks so nice :-D


More in next post...
Viewing all 65 articles
Browse latest View live